Australia
 Brazil
 China
China Croatia
 Europe
 France
 Germany
 Italy
Italy Japan
Japan Latin America
 Netherlands
 Spain
Spain Turkey


Editor's Note: This blog was written by Dr. Paulo Vinicius Soares. He's an internationally known dentist, lecturer, professor, researcher, and author practicing out of Brazil.
The type of treatment clinicians provide to the internal surface of the ceramic restoration is essentially what dictates the quality of bond we can obtain. Knowing that a high-quality treatment of the ceramic generally results in an ideal level of bonding, it is important that dentists do not underestimate the importance of using great quality products and the impact that these may have during any of our restorative procedures.
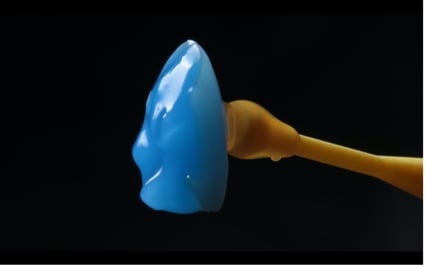
Ultradent™ Porcelain Etch is a hydrofluoric acid that has enough fluidity to wet the ceramic surface and achieve the correct conditioning impact. At the same time, Porcelain Etch also offers the ideal plasticity to keep the product from flowing out of the internal limit of the restoration. This perfect balance between wetting capacity and optimal plasticity is a distinguishing feature of Porcelain Etch.
Ultradent™ Silane generates the perfect chemical reaction on the ceramic’s surface. The tips that come with these products facilitate the process of spreading them on the inside of the ceramic restoration.
The clinical images below demonstrate the functionality of Porcelain Etch and Silane. The clinical aspects of Figures 1 and 2 were obtained after trying non-vital internal whitening. Unfortunately, because of the extreme calcification of dentinal tubules, the result was unsatisfactory. These images are similar to many cases we see in our day-to-day practice:
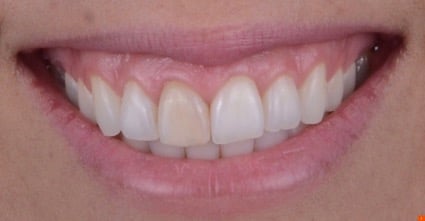
- Case of esthetic demand, maxillary right central incisor darkened and treated endodontically. Patient, female, 40 years old. It was decided to remove unsatisfactory restorations of composite resin and, due to loss of structure and level of darkening, make a conventional ceramic veneer.
- Intraoral view emphasizing the level of darkening of the maxillary right central incisor.
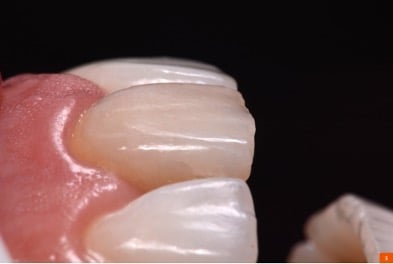
- Lateral view of maxillary right central incisor.
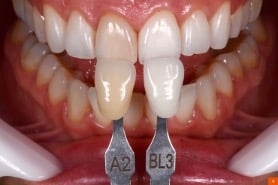
- Substrate color of maxillary right central incisor (A2) and left central incisor (BL3).
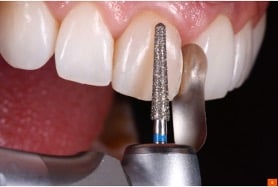
- Start of preparation with diamond-tipped 4138 coupled at a contra-angle multiplier 1:5 and electric motor.
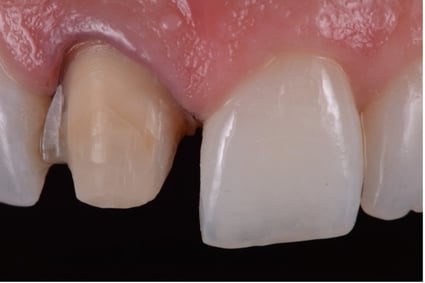
- Conventional veneer preparation, removal of Class III and Class IV restoration from the mesial side, remaining to remove the Class IV restoration from the distal angle. Veneer preparation is considered conventional when an adhesive area predominates over enamel. In this case, there is a need for greater wear (above 1.0 mm on average) to give the ceramist enough space to opacify and characterize.
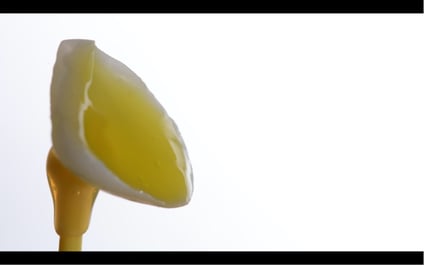
- Internal surface of the veneer being treated with hydrofluoric acid, Porcelain Etch for 90 seconds.
- After rinsing with water, clean the restoration with phosphoric acid, Ultra-Etch™ etchant, for 5–10 seconds.
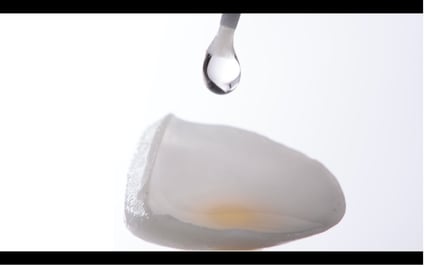
- Application of Silane, wait for at least 60 seconds.
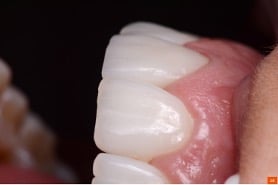
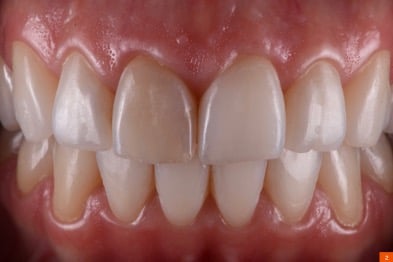
- Intraoral side view of the veneer and the natural tooth. Respect for dimensions, shape, color, and texture. Restoration by technician Rafael Stoque (Uberlândia, MG).
- Final front view, post-cementation.
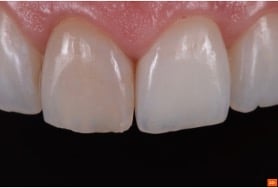
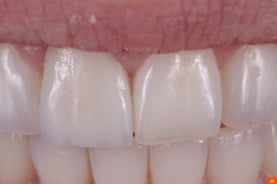
- Initial front view.
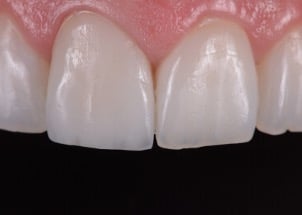
- Final front view.
I hope that these clinical images have better illustrated some of the reasons why I not only use Porcelain Etch and Silane in my dental office, but also make sure to recommend them to all my students in my courses.