Step One
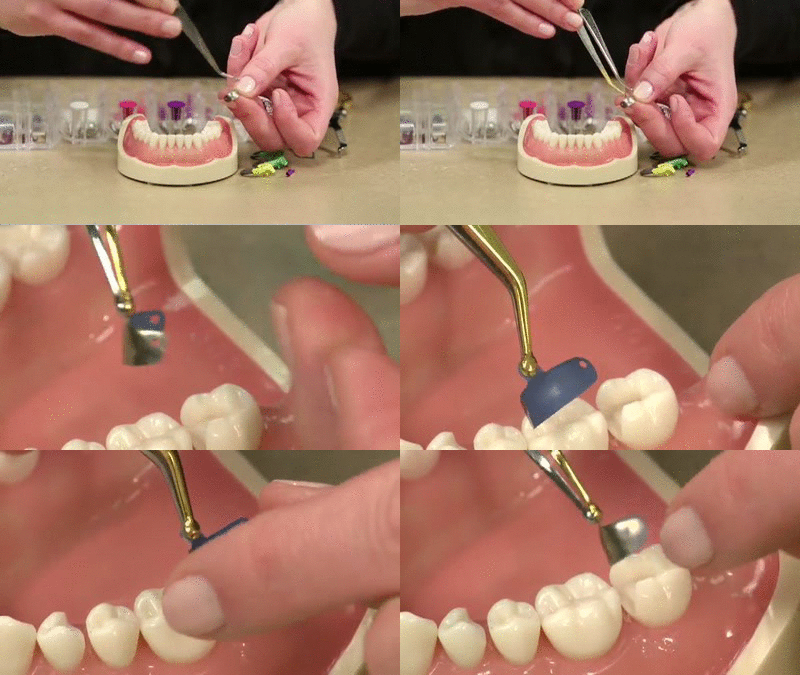
Grip the tab at the top of the matrix band with the pin tweezers. Practice getting comfortable using the tweezers, as the top of the tweezers work by pressing to open, and the bottom of the tweezers work by pressing to grip. The tab on side of the band are for removal after use.
Step Two
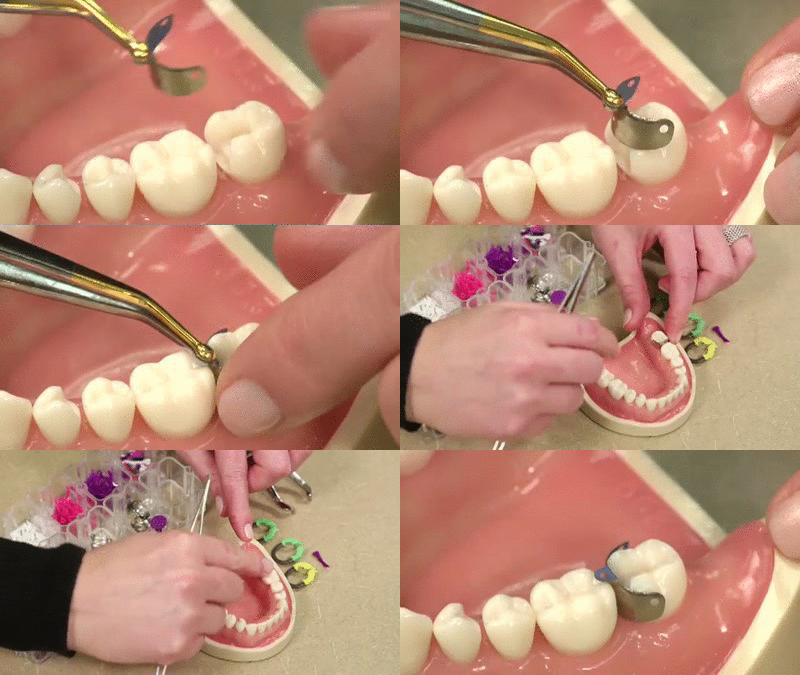
Turn the band to a right angle, and place it into the preparation. Once placed, bend the tab at the top of the band toward the adjacent tooth.
Step Three
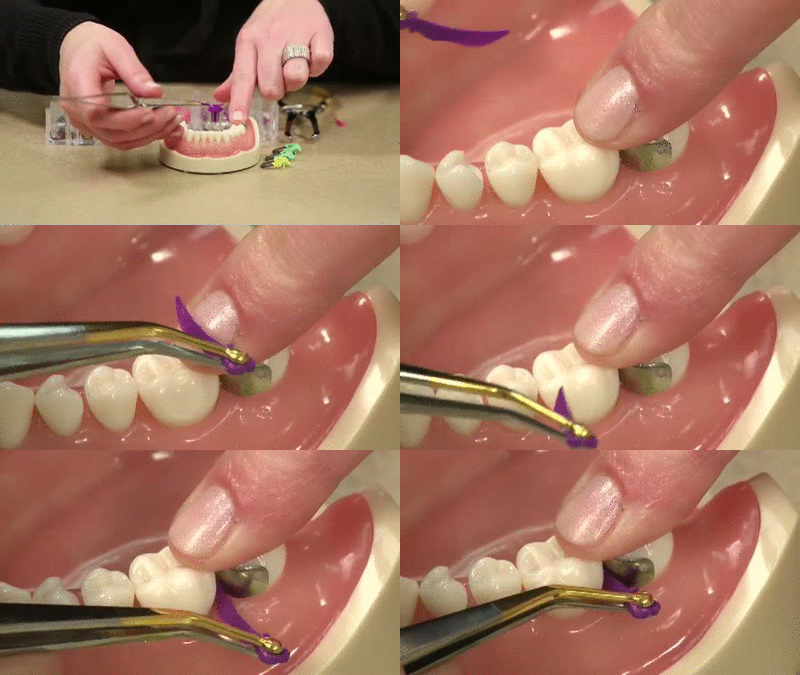
Grip the contoured Wave-Wedge with the pin tweezers. For a double wedge, slide a second Wave-Wedge onto the bottom of the first so the handles face opposite one another.
Step Four
Place the contoured Wave-Wedge into the preparation, behind the matrix band, while holding the band down in place by pressing on to the band’s top tab. Stop when you feel a slight resistance. The wedge helps give greater contour to the band and minimize margins.
Step Five
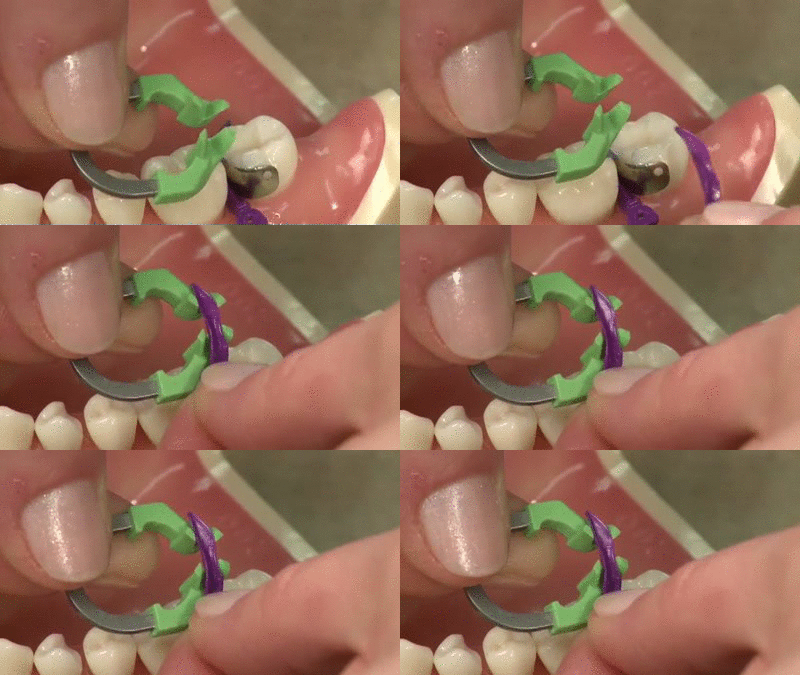
Pick up the V3 Ring with tweezers. Notice how the ring’s shape perfectly accommodates the Wave-Wedge to create more stability and to help the ring fit perfectly on top of the wedge.
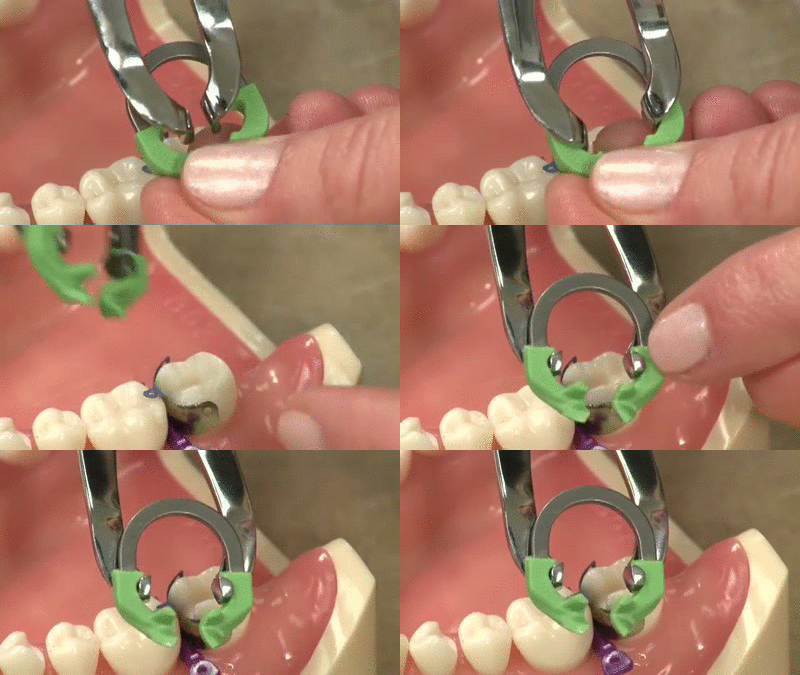
Step Six
Place the V3 Ring around the preparation by pressing it against the matrix band and rocking onto the top of the Wave-Wedge. Secure the ring by pressing down lightly with an index finger while removing the tweezers.
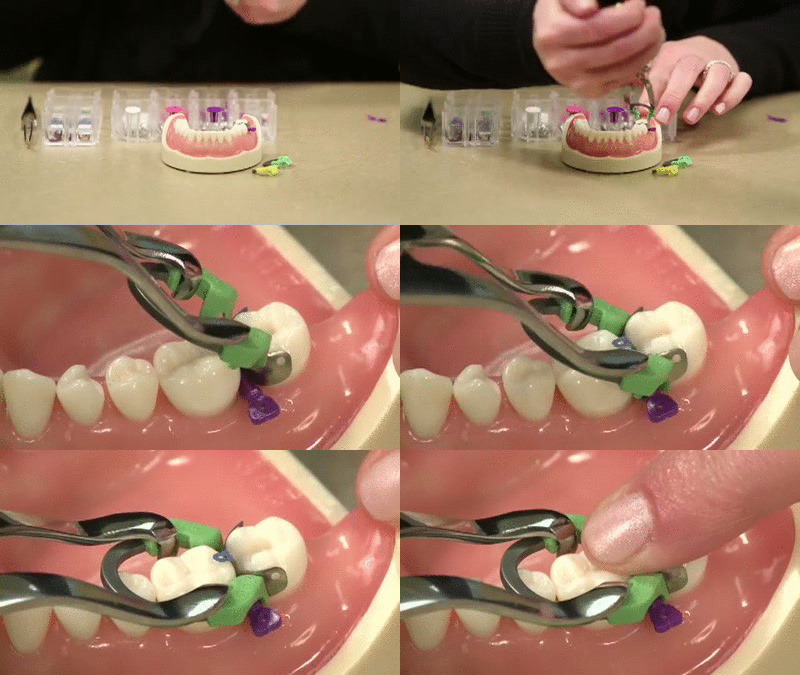
Step Seven
Lightly burnish.
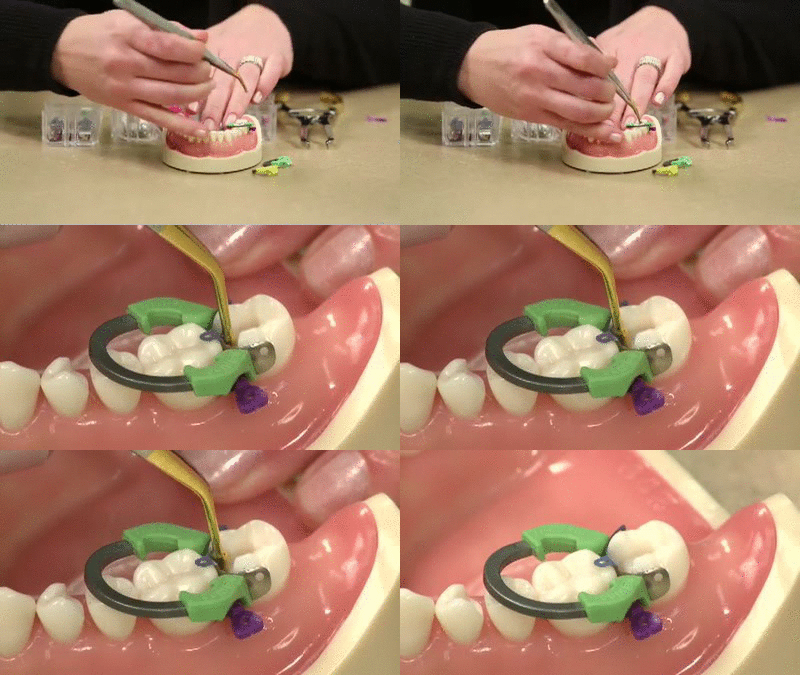
Step Eight
For pediatric teeth, the bicuspid, or the distal of the canine, use the smaller, yellow V3 Ring.
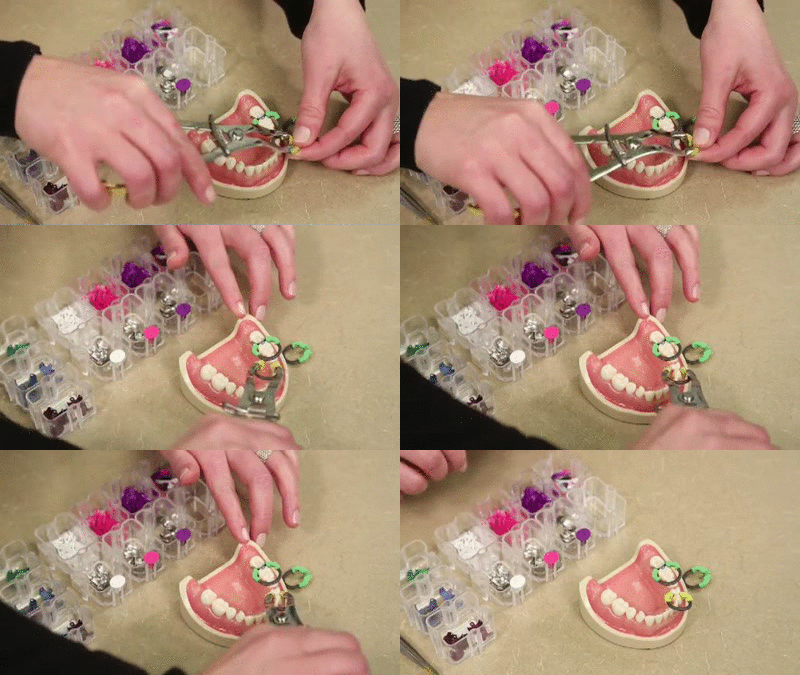
Step Nine
For an MOD on the bicuspid, “butterfly” the larger, green ring by placing it opposite the yellow ring.
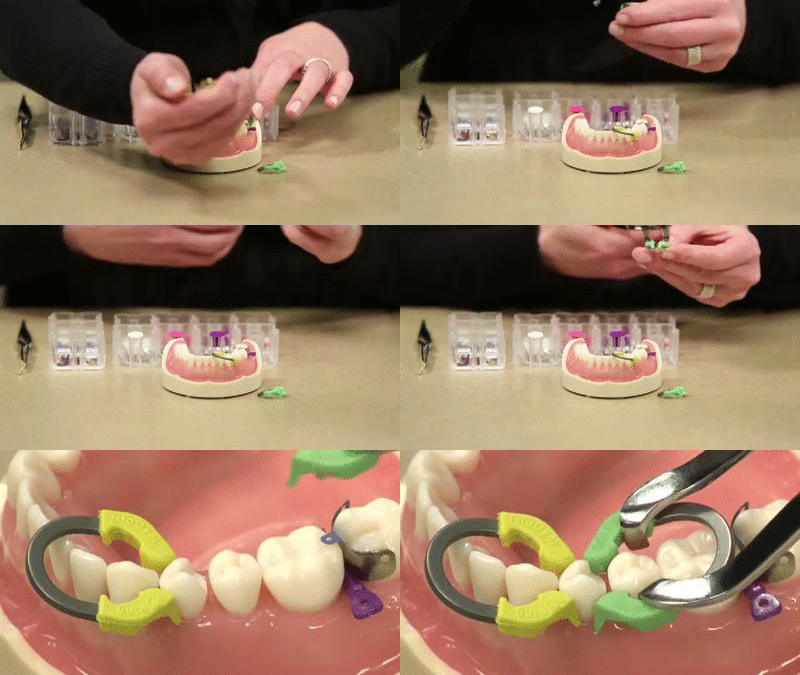
Step 10
For quadrant dentistry, or for an MOD on a molar, place the forward ring first, and stack the second ring, facing the same way, on top of the first. Easy!
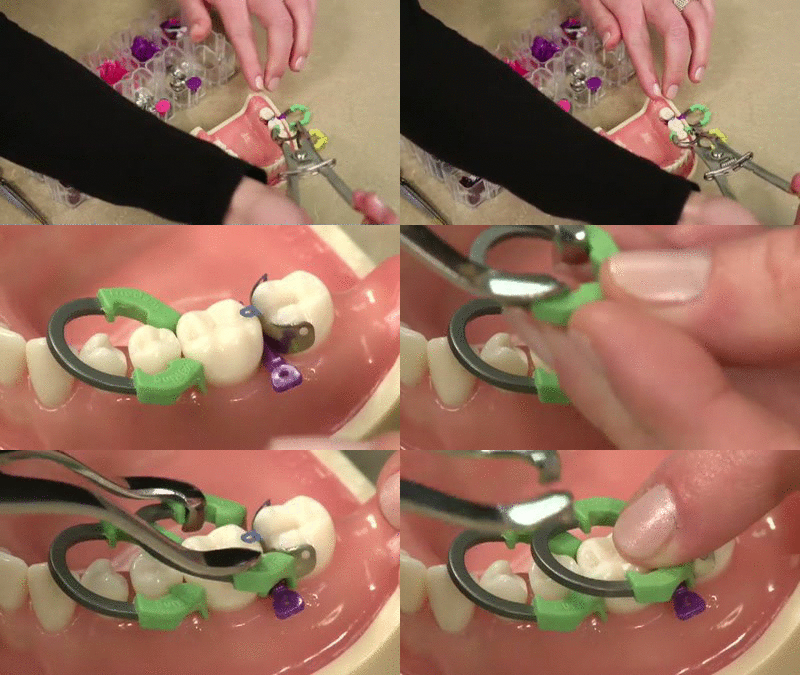
Congratulations! You have just mastered the Triodent V3 Sectional Matrix System.


